Homemade No Bake Granola Bars
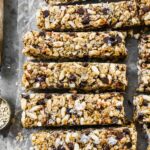
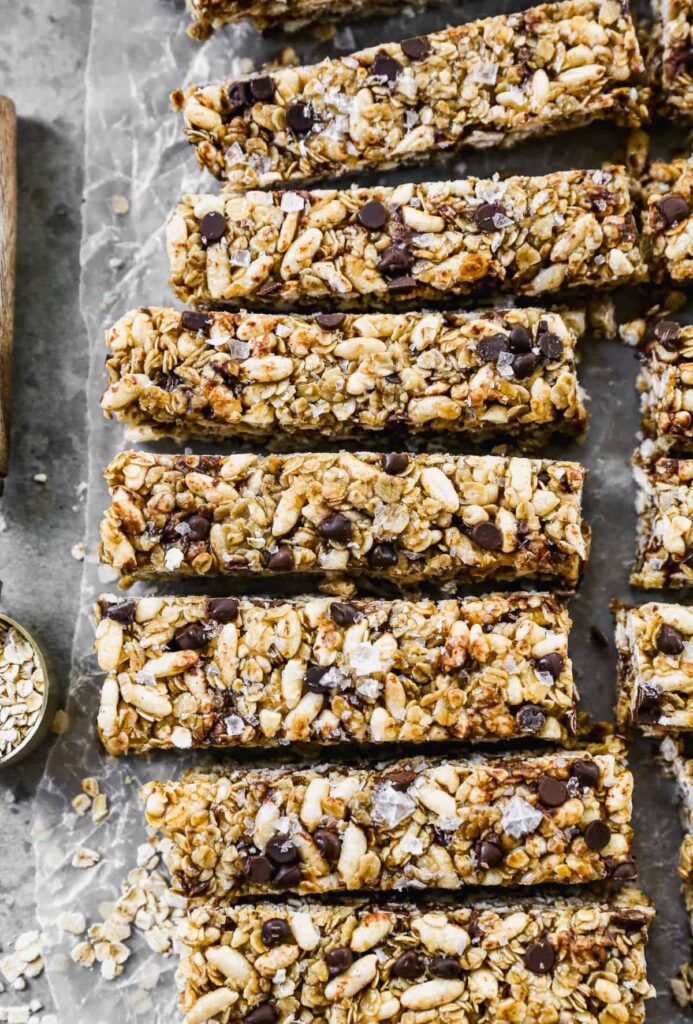
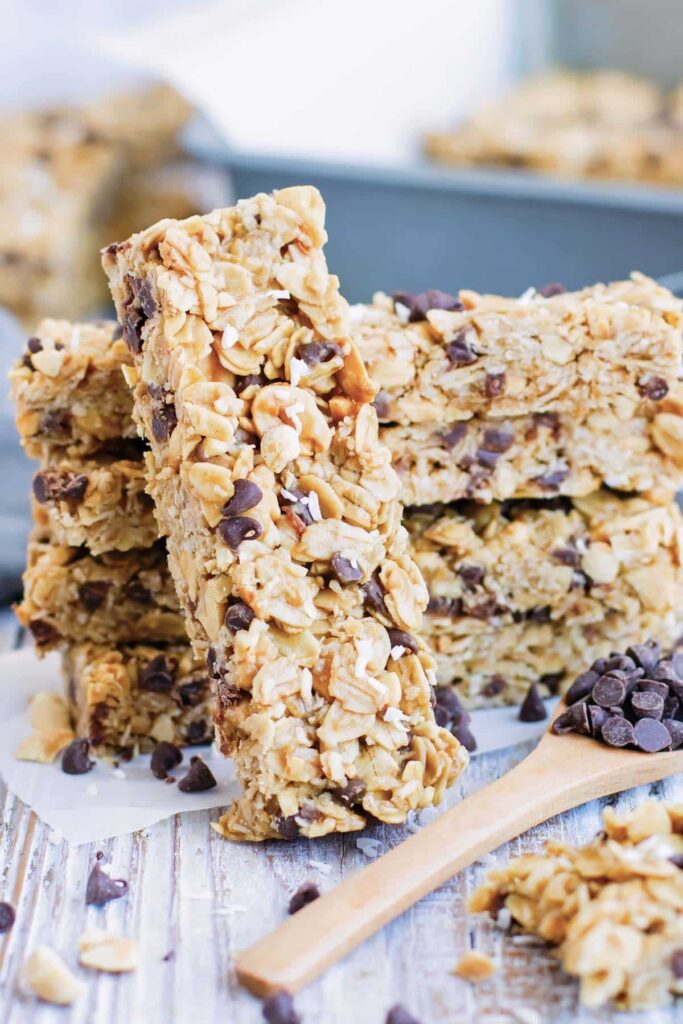
Homemade no-bake granola bars are the perfect snack for busy days, school lunches, or a quick energy boost. They are easy to make and packed with wholesome ingredients. With just a few minutes of prep time and no baking required, you can create delicious bars that suit your taste. Customize them with your favorite mix-ins for a unique treat every time!
Why You’ll Love This Recipe
- Quick and Easy: Whip up these bars in just 10 minutes of prep time.
- Nutritious Ingredients: Packed with oats and nut butter, they provide sustained energy.
- Customizable: Add your choice of chocolate chips, seeds, or dried fruits for variety.
- No Baking Required: Simply mix, press, and chill—no oven necessary!
- Perfect for Any Occasion: Ideal as a breakfast on-the-go, snack for kids, or a guilt-free dessert.
Tools and Preparation
To make your homemade no-bake granola bars efficiently, you’ll need a few essential tools. These will help ensure that your recipe comes together smoothly.
Essential Tools and Equipment
- Baking dish (8×8-inch)
- Parchment paper
- Mixing bowls
- Small saucepan
- Spoon or spatula
Importance of Each Tool
- Baking dish: A square baking dish helps shape the bars uniformly for even cutting.
- Parchment paper: This makes removing the bars from the dish easy and mess-free.
- Mixing bowls: Having separate bowls allows for organized ingredient mixing.
- Small saucepan: Perfect for melting nut butter and honey together without burning.
Ingredients
To make the best homemade no-bake granola bars, gather the following ingredients:
Base Ingredients
- 2 cups old-fashioned rolled oats
- 1/2 cup nut butter (peanut butter, almond butter, or cashew butter)
- 1/3 cup honey (maple syrup or agave)
Mix-Ins
- 1/2 cup mix-ins (chocolate chips, dried fruit, seeds, or nuts)
- 1 teaspoon vanilla extract (optional)
- Pinch of salt
How to Make Homemade No Bake Granola Bars
Step 1: Prepare Your Pan
Line an 8×8-inch baking dish with parchment paper. Leave extra hanging over the sides for easy removal later.
Step 2: Mix Dry Ingredients
In a large bowl, combine the 2 cups of oats with your chosen 1/2 cup of mix-ins, like chocolate chips or dried fruits.
Step 3: Heat Wet Ingredients
In a small saucepan over low heat:
1. Melt the 1/2 cup of nut butter and 1/3 cup of honey (or maple syrup/agave) together.
2. Stir continuously until smooth and fully combined.
3. If using, stir in the 1 teaspoon of vanilla extract and add a pinch of salt.
Step 4: Combine Wet and Dry Ingredients
Pour the melted nut butter mixture over the oat mixture in the bowl. Stir well to ensure all oats are coated evenly.
Step 5: Press into the Pan
Transfer this mixture to your prepared baking dish. Using the back of a spoon or spatula, press it down firmly to pack it tightly.
Step 6: Chill
Place the pan in the refrigerator for at least 2 hours. This allows the bars to firm up enough to cut.
Step 7: Slice and Serve
Once set, lift out the bars using the parchment paper handles. Cut into 10-12 bars. Enjoy immediately or store them in an airtight container for later!
How to Serve Homemade No Bake Granola Bars
Homemade no-bake granola bars are versatile and can be enjoyed in various ways. Whether you need a quick breakfast on the go or a satisfying snack, here are some serving suggestions to enhance your experience.
Pair with Yogurt
- Top your favorite yogurt with crumbled granola bars for added texture and flavor.
Enjoy with Fresh Fruit
- Serve alongside sliced bananas, strawberries, or apples for a refreshing balance.
Drizzle with Nut Butter
- Add a drizzle of nut butter on top for an extra protein boost and rich taste.
Use as Topping for Smoothie Bowls
- Crumble over smoothie bowls to provide a crunchy element that complements creamy textures.
Pack in Lunchboxes
- Include these bars in lunchboxes for a wholesome snack that kids will love.
Serve with Herbal Tea
- Enjoy with a cup of herbal tea for a calming afternoon break or dessert option.
How to Perfect Homemade No Bake Granola Bars
Making homemade no-bake granola bars is simple, but a few tips can help you achieve perfection. Follow these guidelines to ensure your bars turn out just right.
- Use fresh ingredients: Make sure all your ingredients, especially oats and nuts, are fresh for the best flavor and texture.
- Customize mix-ins: Experiment with different add-ins like seeds, dried fruits, or even coconut flakes to personalize your bars.
- Press firmly: When packing the mixture into the pan, press down firmly to ensure the bars hold together well after chilling.
- Chill long enough: Allow your bars to chill for at least 2 hours; this helps them set properly and makes slicing easier.
- Cut while cold: For clean edges, slice the bars while they are still chilled from the refrigerator.
Best Side Dishes for Homemade No Bake Granola Bars
Homemade no-bake granola bars pair wonderfully with a variety of side dishes. Consider these options to make your snack time even more enjoyable.
- Fresh Fruit Salad: A mix of seasonal fruits adds natural sweetness and freshness.
- Nut Mix: A handful of mixed nuts provides healthy fats and protein.
- Cheese Platter: Pair with cheese slices like cheddar or gouda for a savory contrast.
- Veggie Sticks: Crunchy carrot and cucumber sticks offer a refreshing crunch.
- Hummus Dip: Creamy hummus serves as a tasty dip for raw veggies or crackers.
- Cottage Cheese Bowl: Creamy cottage cheese topped with honey or cinnamon complements the sweetness of granola bars.
- Oatmeal: Serve alongside warm oatmeal, enhancing fiber intake and providing comfort.
- Smoothie: A fruit smoothie pairs perfectly for an energizing snack or light meal option.
Common Mistakes to Avoid
Making homemade no-bake granola bars is easy, but a few common mistakes can ruin your efforts. Here are some pitfalls to watch out for:
- Skipping the Parchment Paper: Not lining your baking dish makes it hard to remove the bars later. Always use parchment paper for easy lifting.
- Not Measuring Ingredients Accurately: Using too much or too little of the ingredients can affect texture and taste. Use measuring cups and spoons for precision.
- Overmixing the Ingredients: Mixing too much can break down oats and make the bars crumbly. Stir just until combined to maintain the right texture.
- Insufficient Chilling Time: Cutting the bars before they set leads to a messy outcome. Chill them for at least 2 hours for proper firmness.
- Ignoring Customization Options: Sticking only to basic ingredients limits flavor. Experiment with different mix-ins like dried fruits or seeds for variety.
Storage & Reheating Instructions
Refrigerator Storage
- Store in an airtight container.
- They last up to 1 week in the refrigerator.
Freezing Homemade No Bake Granola Bars
- Wrap each bar individually in plastic wrap.
- Store in a freezer-safe container for up to 3 months.
Reheating Homemade No Bake Granola Bars
- Oven: Preheat to 350°F (175°C) and warm bars for about 5 minutes.
- Microwave: Heat one bar on high for 15-20 seconds until warm.
- Stovetop: Place bars in a non-stick skillet over low heat, flipping occasionally until warmed through.
Frequently Asked Questions
Here are some common questions about homemade no-bake granola bars:
How do I make my Homemade No Bake Granola Bars healthier?
You can substitute honey with maple syrup or agave, and add more seeds or nuts instead of chocolate chips to boost nutrition.
Can I customize my Homemade No Bake Granola Bars?
Absolutely! Feel free to add any mix-ins you love, such as dried fruits, seeds, or even coconut flakes.
What if my Homemade No Bake Granola Bars are too crumbly?
If they crumble too much, try adding more nut butter or sweetener next time to bind them better.
How long do Homemade No Bake Granola Bars last?
When stored properly, they can last up to a week in the fridge and three months in the freezer.
Final Thoughts
Homemade no-bake granola bars are not only quick and easy but also versatile. You can tailor them with your favorite ingredients and enjoy them as a nutritious snack anytime. Try making these delightful bars today!
Homemade No Bake Granola Bars
Homemade no-bake granola bars are the ultimate snack for anyone on the go. With just a few minutes of prep time and no baking involved, these bars offer a delightful combination of wholesome ingredients that keep you energized throughout the day. Packed with old-fashioned rolled oats and creamy nut butter, they provide sustained energy while being completely customizable with your favorite mix-ins like chocolate chips, dried fruits, or seeds. Perfect for breakfast, school lunches, or an afternoon pick-me-up, these nutritious bars are not only easy to make but also deliciously satisfying. Treat yourself to a quick and healthy snack that suits your taste!
- Prep Time: 10 minutes
- Cook Time: None
- Total Time: 0 hours
- Yield: Approximately 12 servings 1x
- Category: Snack
- Method: No Bake
- Cuisine: American
Ingredients
- 2 cups old-fashioned rolled oats
- 1/2 cup nut butter (peanut butter, almond butter, or cashew butter)
- 1/3 cup honey (or maple syrup/agave)
- 1/2 cup mix-ins (chocolate chips, dried fruit, seeds, or nuts)
- Pinch of salt
Instructions
- Prepare an 8×8-inch baking dish by lining it with parchment paper.
- In a large bowl, mix together the rolled oats and chosen mix-ins.
- In a small saucepan over low heat, melt the nut butter and honey until smooth. Stir in any optional ingredients like vanilla extract and salt.
- Pour the melted mixture over the oat blend and stir until fully combined.
- Transfer the mixture to the prepared dish and press down firmly.
- Chill in the refrigerator for at least 2 hours until set.
- Lift out using the parchment paper and cut into bars.
Nutrition
- Serving Size: 1 bar (approximately 40g)
- Calories: 180
- Sugar: 9g
- Sodium: 30mg
- Fat: 8g
- Saturated Fat: 1g
- Unsaturated Fat: 7g
- Trans Fat: 0g
- Carbohydrates: 24g
- Fiber: 3g
- Protein: 5g
- Cholesterol: 0mg

